Wednesday 8 June 2016

Starting With the Creator Pro

Setup went well.  Instructions in the manual were good enough.  
Plate leveling went well also.  The card included with the box that you can use for leveling is nice.

With my Finder I printed a filament tube guide from Thingiverse:

The bad thing is that the connector side snapped, but the good news it still worked.

I'm not sure if it's Flashforge's filament but the filament snapped TWICE while I was loading it!

Loading the PLA filament into the right extruder was fairly straight forward and just like the Finder.
What's interesting is that the filament that came out was kind of red and merged with my green filament.  I assume this shows the printer was tested with red filament before it came out of the factory.


 Differences moving up from the Finder to Creator Pro:

  1. Interface:  definitely not as nice as the Finder's touch screen.  But this is just cosmetic preferences.
  2. Build plate leveling knobs - not as easy to get at like the Finder.  Partially obstructed by the metal build plate.  Not a huge issue, just different than the Finder.
  3. Heating the build plate will mean it will take longer to print but this is the sacrifice for not having parts lift.  You can turn this option off I think.
  4. You can't remove the build plate so tougher parts have to be muscled on top of the build plate inside the machine.  I'm concerned this can put off my z-axis.
Patience...steeper learning curve but it will all pay off in the end.


Monday 6 June 2016

Day 0 with the Flashforge Creator Pro

Picked up the 2016 Flashforge Creator Pro and Simplify 3D from Digitmakers today!  Also grabbed some filament including glow-in-the-dark and PLA+ to play with.  Lots of learning to do in my summer!
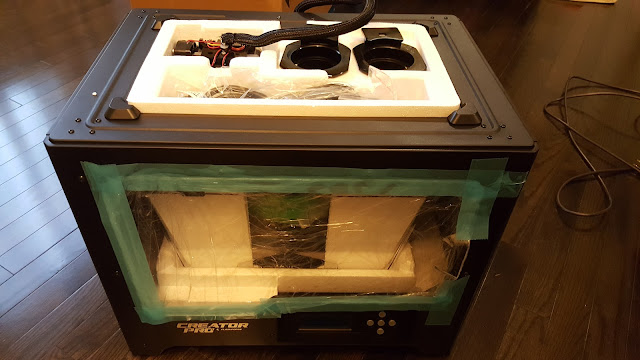
Opening the box there's the Quick Start Guide to go through that also has instructions on how to unpack to Creator Pro.
 It was pretty stuck in the box, but with my wife's help we got the whole thing out.
 And here's what the extruder unit looks like before I put it to work.  Good bye clean extruders!
 I had noted the heating block was bigger on one extruder and emailed Digitmakers about it.  It's not a problem.
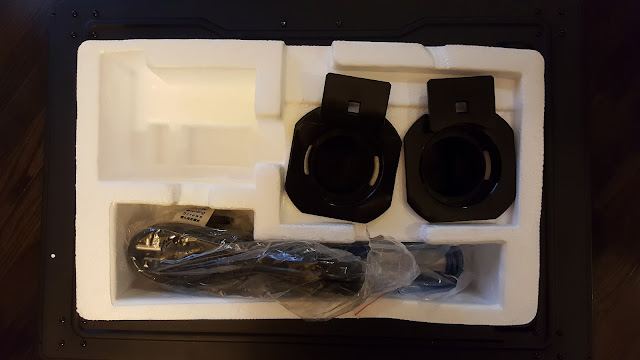
 Now the top of the Creator Pro has this chunk of styrofoam in it that is holding the spool holders and some cables and tools.  The diagram shows it lifting out pretty easy but for me this was a HUGE problem.  It was so jammed in there it took me 10 minutes to wrestle with it to get it out.  Definitely not as easy to set up as a Flashforge Finder!
 One thing I should point out is that it comes with a fan that will blow onto your print surface.  I didn't even see this pointed out on the website or pictures before I bought the printer so it was a most welcome surpise!
That's all for today!  I'm going to print some Thingiverse mods before I put the Creator Pro to work.  I'll put that up in the next post!

Sunday 5 June 2016

30 Days with the Flashforge Finder

30 Days with the Flashforge Finder
340 hours of use, 1096 meters of filament used, 150+ projects printed
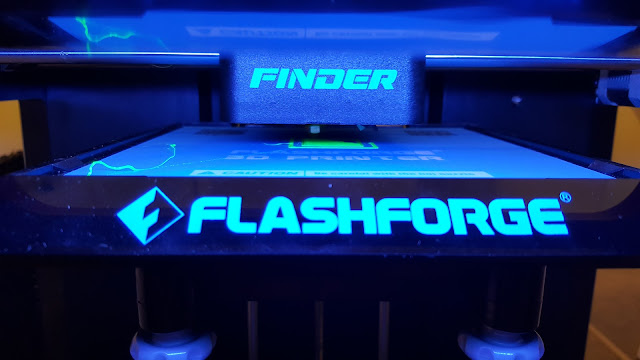

Hard to believe 30 days ago I walked out of Digitmakers in Richmond Hill, Ontario, Canada with my first 3D printer.  Actually it was 2 of them.  I'll explain why I have to 2 later but for now I can say that it certainly accelerated my learning as I had at least one on me at work and at home.

My background and goals: To understand my angle on how I evaluated this printer, my experience with 3D printing is with using the industrial quality uPrint Plus for about 3 years but zero experience with consumer level 3D printers.  I have some cad modelling experience as a mechanical engineer and my goal is to build a 3D printing hub that schools can use.  So I am looking for an ok consumer level printer that is portable, relatively cheap (so I can buy multiples) and easy to maintain.  There isn't a lot of in-depth talk about the Flashforge Finder online so I hope this will provide you with lots of information to help you make an informed choice of what printer might work best for you.  

To this date I can say that every single challenge I had with the Finder I was able to remedy.  I printed a lot of stuff and had many failures, but I saw that as all part of the learning process in getting into 3D printing.  It's all here on the blog to give you an honest look at what happened when someone new to 3D printing at home chose the Finder to work with. 

1.  The Good
  • The printer is fairly portable as I have been bringing them back and forth from work most of the week days.  The built in filament caddy helps a lot with this and so does the cube shaped body design.
  • Comes with all tools you may need to maintain or fix it
  • Comes with an easy to use slicer program - FlashPrint
  • USB file loading works great with good menu control (and it comes with a usb stick)
  • The Flashprint software is a pretty versatile program where you can duplicate and cut models
  • Flashprint has an advanced mode where you can tweak speeds, temperatures, motor power and almost anything I can think of with the printer's abilities.
  • The Finder has calibration features from the LCD menu
  • Bed leveling assist is great for beginners but you can learn to do without it
  • Not too loud when operating
  • Plays a song when the print is finished
  • Print area well lit with LED light panels
  • The removable build plate makes it a lot easier to take your parts out
  • Removable build plates increase production times if you buy a spare
  • Build plate surfaces can also be replaced
  • Filament jams aren't too complicated to fix
  • The body is available in multiple colors, not just red!
  • $650CAN is great for what you get!
2.  The Bad
  • The X and Y axis do slam into the sides of the printer.  Galen's recommendation is a good one.
  • Tough to print long, flat objects but I eventually solved this for most projects.(see past posts).
  • The stepper motors running the X and Y axis can get pretty hot and are supported by plastic parts.  I'm kind of concerned about this but so far it has been ok.
  • It needs to come with nozzle/hot end cleaning tools as a jam caused filament to get all around the hot end and now it smells like burnt PLA
  • It needs an external filament caddy feature because some people may not like buying the more expensive Flashforge PLA
  • It needs a Clear Memory function on the LCD to clear the copied files.
  • Flashprint underestimates build times.  I am doing a study on how far off it is, but it will take at least 15% more time than it states.
  • Only prints in PLA but that is stated upfront.
3.  The Ugly
  • Flashforge filament had tangled twice in one roll.
  • I'm still unable to connect wirelessly.  This is a work in progress but so far no results.
  • Some rafts are impossible to remove without wrecking the edge that it was connected to.
Tips for New Users:

  1. Be patient.  3D printing has a learning curve and you will have to experiment with what works before getting things perfect.  Sometimes prints come out perfect the first time.  Sometimes they screw up after several runs.  Either way, you should accept that each failure is part of the learning experience that is part of getting good at 3D printing.
  2. Learn a CAD package.  I recommend starting with Tinkercad. Make an Autodesk account so it saves your work and then do everything in the Lessons section.  This way you can import and modify things you want to print or even make some of your own.  When you get good and need more ability try Autodesk's Fusion 360 which also has a great section on learning how to use it.  Some also like 123D Design which is in between Tinkercad and Fusion.
  3. Printing with white helps you spot errors easier in your prints in my opinion.  I can spot imperfections easier and see if stuff burned.  
  4. You don't have to level your bed every print.  I think started levelling it maybe every 10 prints but also depending on how long the print is and if I travelled with the printer.  On the Finder I cheat the bed level a bit by not unscrewing everything all the way and just leaving it to check.  Maybe this screws it up but I've had fine results so far.
  5. If you want greater control of things in FlashPrint go to File --> Preferences and change the window to Expert mode.  This will let you fine tune a lot of things in the print!  I will post more on this later.
  6. Getting things to stick.  The options are : nothing, blue tape, glue stick, glue stick and blue tape.  The combo seems to work best for me when I don't want to take chances but sometime sI get prints to stick on the bare build plate.  If you have trouble with curling on long flat pieces, add a raft.  If the raft sticks too much to your print, raise it 2mm above and add supports and a raft.  It will create a rough edge but you won't have curling.
  7. If your parts don't fit on your build plate, just slice them up using the cut function in Flashprint.  You can cut cut parts too and auto arrange them later or delete them and separate them into different print files.
  8. Save your files on the USB and sort things into a "done" folder so you don't have to scroll a lot to find your latest print.  In the Finder it will sort them by date.
  9. Use the USB to load prints, don't use your computer hooked up to it.  That was the advice of the store and I don't plan on finding out why.
  10. Add Galen's end stops to your X/Y axis to stop the smashing into the sides.  
There are more tips and solutions you can find by searching this blog.

Overall this is an awesome printer and I can do a lot with it that suit my needs.  My goals for owning a 3d printer is to use it in a classroom setting and develop a 3d printing hub for classes to use.  So I am needing many printers to increase my output to serve 100's of kids.  I also need to bring it from school to home, so stability in structure was important to me.  I am willing to sacrifice some flexibility and quality to achieve this.  Ideally I'd like Lulzbot Taz 6's but for the price of one of those, I can get 5 Finders and I have to go with output ability and portability.  I'm also funding this hub with my own money since my school will only allow the purchase of 3D printers that are $5000+ (yes, it makes no sense).

In the future I need to play with the advanced settings on FlashPrint to see if I can refine the quality some more.  So far it has been great, but I know it can do better especially on the first layer.

I am currently looking at 2 more Finders or a Flashforge Creator Pro for my next one...or maybe even 3 Tarantulas or 3 Wanhao Duplicators if I can set up a permanent print room in my home.
If I get something that's not the Finder, I'll blog some more for you all.

My 3D Printing Tool Kit

What's currently in my 3D printing tool kit:

First of all lets frame this right:  My kit is for when I go traveling with my 3D printer which I do almost ever day.
Hobby Tool Box:  I got this from Solutions but I'm not sure if they sell it any more.  It basically expands when you open it, has 2 levels and I'm able to fit almost everything inside.

In the Tool Box:
  1. Hex wrenches and screwdriver that came with the Flashforge Finder
  2. Elmer's Washable Gluestick (always have a spare)
  3. 3D printed Ring Sizers (test people's ring sizes before you build the ring)
  4. Work Gloves (wear the one that holds the part you are trying to scrape off.  This is so that my scraper does not jab my hand since I don't want to bleed all over my 3d print!)
  5. Sandpaper

 In the tool case (from right to left in the picture)
  1. Husky Paint Scraper from Home Depot
  2. Plastic paint scraper from Walmart 
  3. Metal eating utensil knife (before I got the scrapers...don't use this as much now)
  4. Tweezers
  5. Long needlenose plyers
  6. Wire clippers
  7. Elmer's Washable Gluestick
  8. Husky Utility Knife (great for cutting painter's tape)
  9. Blue Painter's Tape (get the widest one you can!)
  10. Scissors
  11. File (for smoothing out rough printed edges)

  Other Items:
  1. Vacuum seal bags with dessicant bags (I save them from various things and use them here to help stop the stored filament from absorbing any moisture)
  2. Spare build plates and build plate sheets (I like a faster turnover)
  3. Digital caliper (for measuring part accuracy.  Got a cheapy one from Amazon)
  4. Measuring tape

Saturday 4 June 2016

Ring Sizers

Ring Sizers
http://www.thingiverse.com/thing:11458
118min/1.81m/$0.74

I want to make rings as a project for my students so I dug up my old plastic ring sizer.  It was missing 2 rings so I looked up new ring sizers on Amazon.  The decent ones were like $15, less if it's plastic.  Then I realized I COULD PRINT MY OWN!!!!

On to Thingiverse and there they were!  Ring sizers!

Greatest 3D printing moment so far!

I loaded it up.  Tried blue tape + glue and then I heard things falling out of the printer.  Came to find this epic fail:

Cleaned it up a bit and added a raft. Worked out MUCH better, although I had to use a lot of material with the raft now.  But the rings work great and separate very well from the raft.

Megaman X - fail and fix

Megaman X - 150% scaled up
503min/21.53m/$1.63

One of my students asked me to print this Megaman X figure.  It was small so I scaled it up so the details could show.  I also put the print quality to Fine so that the curves would come out nicer.

It took me 3 tries to get this right as demonstrated below.

1st try:  raft + supports, standard suppose from Flashrpint.  Failed because supports in both arms fell.
2nd try:  added custom supports to the Flashprint ones.  Left are OK, right arm fail as support broke.
3rd try:  went nuts with custom supports for the right arm.  SUCCESS!!!


The build time is pretty crazy.  Almost 10hrs!  This is easily the biggest print I've done.

Partway through I checked my 3rd print to see this and was relieved I finally got a good configuration to print.


D&D Earth Elemental

D&D Earth Elemental
137min/7.37m/$0.56

mz4250's elemental series are all pretty awesome.  I had a bit of trouble printing this one.  I thought it was a pretty solid design with supports in but I got a few fails.  I thought it would stick well to a new sheet face.  Nope.
 So I added some glue.  Nope.
 So I added tape and glue. Nope.
Turns out all I needed was a raft!
Great figure.  Put those rafts in!

Friday 3 June 2016

D&D Stone Golem

Stone Golem
52min/2.01m/$0.15

Another straight up awesome mini by mz4250.  This one I printed without a raft at normal size.  I think I will print it scaled up a bit to represent a tougher golem but this did well and I made 3 of them (but 1 at a time.)


OpenForge Rowboats (fail and fix)

OpenForge Rowboats for D&D
Rowboat and 2 oars:
100min/6.49m/$0.49

I tried to make one set of medium sized rowboats with oars.  I didn't use a raft and naturally it came undone even on blue tape with glue.


So I added a raft, and it came out quite fine.

But I wanted a boat so that more characters could fit on it.  I uploaded the design into Tinkercad and then just scaled it to be bigger.  It was quite easy.  The limits of my Finder are 14cm x 14cm for the base so I made this reasonably big.

Realizing I would need a giant raft and I was worried that such a large flat print would lift and get ruined, I decided to re-orient the part so I could use supports instead of the huge raft.

It turned out really well even though some supports got screwed up!  Check out the dangling filament!
 And finally the true test is adding figures.  This one fits a party of 7.  Scaling is good stuff!

Thursday 2 June 2016

Open Forge Wood Floor - Failure and Fix


I wanted to try and do some modular flooring for D&D but the problem was that a print of just ONE floor tile would take over an hour!

So I took the file for the wood floor and modified it by chopping off the base to make it thinner, and thus take up less time and material.

I haven't had trouble with parts lifting so I did a batch and let it run over night.

Then I got my most glorious screw up ever:


So I tried a test with speed settings, dialing it down to see what would happen, and maybe it would stick better also with glue and tape.  Nope:

Tried speed setting again.  Nope:

Then I decided to try a raft with the part 1mm off the build plate and adding supports to hold it.

SUCCESS!  The supports and raft worked so there was no curling.


It actually turned out really well.

And here's the final product with the first disaster next to it.

Tuesday 31 May 2016

Speed Experiments

So it's time for me mess with some of the speed settings to see what they'll actually do.
I've been having some trouble with bed adhesion and I was hoping changing the speed would affect it, but also looking at how the quality would change.

Here's a comparison of time with Peridot at 80mm/s (default) and 40mm/s on "Higher" resolution.

You'll note a few things:
  • 67 minutes vs 128 minutes
  • 2.80m vs 3.20m
  • 474 layers vs 609 layers


Comparing the two prints they look the same from a distance but there you could figure out which one was done with the higher detail by taking a closer look at the layering and edges.  Either way, the normal speed one does fine for what we wanted.

So the effect is noticeable but the questions is: is it really worth the time?


Monday 30 May 2016

Oddish Planter

Oddish Planter
265min/16.31m/$1.24

This looked like a fun present for an Anime friend.
It printed out well.  I added supports and there were a lot between the legs, but they all came off really well!  It is a fun design and was easy to print, although it took over 4 hours.
 Lots of supports under neath the Oddish:
 Supports everywhere!
 But they come off easy.

Sunday 29 May 2016

Eclipse Board Game Cube Tray

Eclipse Board Game Cube Tray
37min/2.41m/$0.18

I thought I'd save a bunch of time and print a set of Blue Lantern rings AND 2 Eclipse game trays.  The rings came out fine but the trays warped because the painter's tape did not stick to the brand new build plate surface (new build plate)!
 So I reprinted just the tray this time and just did it on top of a fresh build plate, no tape, no glue.  It worked great!  No lifting!

Here it is with cubes and on the game board.  Eclipse is an awesome game.  Takes forever to play, but still awesome and I can guarantee I'll probably not even play once this year.

Looking at the fit of the cubes, I measured the holes in the plate and cubes themselves.
Holes = 8.85mm
Cubes = 8.40mm
Very good tolerance and makes for an easy fit for the cubes!