Monday 5 June 2017

How This Site Works - PLEASE READ FIRST

You will see things I am printing on my Flashforge Finder.
They will be listed in the following format:

NAME OF PROJECT
TIME TO PRINT / LENGTH OF FILAMENT / COST IN FILAMENT
Link to file 

I will post almost all my prints here, including my failures so people like you can have a really good idea what this printer can do.

This is kind of an ongoing review of the Flashforge Finder and a chronicle of my 3d printing learning journey.

Tuesday 9 May 2017

Flashforge Inventor II - First Print

For this test we're going to look at dimensional accuracy right out of the box.  The USB Stick comes with the 20mm Box but you will have to put it into the Flashforge Flashprint Slicer to make it printable.

The first thing I noticed was the slightly longer boot up time.  A couple seconds more but it still makes the boot up sound for you.
The display is updated and shows a small picture of what you're printing plus it has a temperature signal on the top right that indicates when the nozzle is hot.
The first thing I did was level the bed plate.  The leveling aid is a pain to a lot of people but I've always had luck with it.  The high pitch beep isn't there any more when you level.  It's a different kind of beep and not as annoying.  Leveling is not any faster and is identical to the Finder.
 Operation was smooth and quieter thanks to the enclsoure.  I believe the extruder is the same as the one in the Finder and so its the leveling finger that comes down to aid you in bed leveling.
They updated the song it plays when it's finished.  I guess the only advantage of that is knowing if my Finder or Inventor II is done.
I had no issues with the cube.  The red PLA that came with the printer was fine.  I know that the filament that fits in the back on the holder costs more per kg than a 1kg spool which is why I'll print a new external spool holder soon.  As you can see I had great bed adhesion right out of the box and didn't use any gluestick to keep it down.
For dimensional accuracy on our 20mm box we've got x = 20.20mm and y = 20.09mm.  Those are pretty good numbers for what I use it for.
Summary and Conclusion:
$840CAD is quite a bit of money for a 3D printer considering that you could get other printers with a larger bed for cheaper or put in a bit more for a Prusa i3.  But this printer is ideal for a school setting because of its full enclosure, door auto-stop and portability.  I think this printer is ideal for people who have:

  • pets (especially cats)
  • small children
  • a drafty environment
  • a classroom setting
  • a need for portability

Compare this to other printers with a full enclosure that don't have auto-stop features on the door:
Wanhao Duplicator 4S - $1070
Wanhao Duplicator 6D - $1149
Flashforge Creator Pro - $1200
Wanhao Duplicator 5S Mini - $1250
Flashforge Dreamer - $1520
ZYYX+ - $2699
Makerbot Replicator 2X - $3400

I can buy 4 of these for one Makerbot Replicator 2X!

It only prints in PLA which is the least toxic of 3D printer materials and it doesn't have a heated bed which reduces the chances of injury or catching fire.  The removable build plate is amazing for a class setting so kids don't have to go into the printer to pry off parts and you can buy more build plates to cycle parts in and out faster.  Although the plate has build tak on it, there's an included glue stick and I know enough tricks from the Finder to ensure bed adhesion so that won't be a problem.

This printer is fresh out of the box but after a longer period of using it I would be concerned about the following:

  1. The filament tube rubbing up against the opening in the enclosure.  It seems very tight and I wonder how the added stress on the motors will affect things in the long run and if the tube will wear down.
  2. How hard it will be to replace the nozzle.  All my Finders have had their PTFE tube clog up and while I'm at it changing the tube, I've decided to put the Micro Swiss nozzle upgrade in. But to grab that nozzle you have to come in from the side and bottom and since the side panels of the enclosure don't come off, this looks like it'll be challenging.
So overall I like the printer and it has lived up to my expectations.  I'll see how well it holds up as I bring this printer on an airplane for a competition later this month!


Flashforge Inventor II vs Flashforge Finder

Here's some quick facts:
Main Improvements:

  1. Full enclosure with door that stops the print when opened
  2. Slightly bigger build size (15x14x14cm)
  3. Side handles for easier transport
Size:
The Inventor II takes up the same space as the Finder.  They are the same size and I believe the same body mold is used from the Finder with the exception of the sides and door.
 Internal Spool Holder:
This is exactly the same as the Finder.  To prove it, I mixed them.

Power:
One big difference is the power supply for the Inventor II.  There is an on/off switch now and the Inventor II's power supply is external in the form of something similar to a laptop power supply.
The Finder's power supply is built in and needs this cooling vent so I think the power supply is an improvement in the Inventor II.
 Enclosure:
To me as a teacher, the biggest improvement is the enclosure.
The sides have grips so you can pull it up which makes things a lot easier for me when I'm visiting schools with my 3D printers.
 The door is held shut by magnets on the top and bottom corners.  The handle of the door sticks out but it's actually a hole in the door.  So don't expect this enclosure to be completely sealed.
The top of the enclosure is removable and it has a t-shaped cut that is offest from the centre so that it is closer to where the filament comes out of the back.
The best way to take the top enclosure on and off is to push in on the area where this t-shape is.  Flexing it inwards will release the two "teeth" that keep it in from the back and you can simply lift it out.
Does the top fit on the old Finder?  Yes!
 Here's a look at the build plates side by side.  My older Finder one is on the left, Inventor II on the right. Same design, just a teensie bit bigger is the Inventor II.  Both surfaces are build tak.
 Here they are on top of each other so you can clearly see the size difference.  As usual, I will be trying to order extra build plates to speed up production.  The removable build plate is a huge plus to me for what I use the printer for as students can focus on safety when removing parts and not worry about wrecking the inside of the machine.
The other thing to note was the cabling of the new Inventor II.  Wires are cleaner and sheathed a bit better than the Finder.


Flashforge Inventor II Unboxing and Setup

The Inventor II was released in May 2017 and I was the first person in my city, perhaps country to get one.   This currently retails from Digitmakers.ca for $840CAD.

The Inventor II is actually the Finder 2 as much of it is based on the popular Flashforge Finder.

The retails cost of this printer is $699USD, which is up from $499USD.  For $200USD more, we'll see what you get in this review series.

UNBOXING

The Inventor II's box is about the same size as the Finder's.  It comes in at 26.2kg, shipped in a box sealed with Flashforge's standard 3D printer tape.

Opening the box, you'll see the instruction manual and warranty in a ziplock bag which is taped to a long cardboard box containing tools and the power supply.
The box contents are:
  1. Power supply and cable
  2. Washable glue stick
  3. Filament tube
  4. USB cable
  5. Bag of parts:
    1. USB memory stick
    2. Screw driver
    3. 2 hex wrenches
    4. Flat metal wrench
    5. Spare PTFE tube
    6. Unclogging device

Turn the box on it's side and pull it out.  You might need help from another person to pull the box while you pull it.  Be careful pulling on the sytrofoam or you might break it.  Wiggle and slide it out slowly.  The Finder has grips on the sides that you can to help you pull and lift it.


Please note that your free reel of PLA is on the bottom of the printer:

Put the Inventor II right side up:

Remove the top styrofoam piece by lifting straight up:

Clip the four tie-wraps as labelled below:

Open the door and remove the plastic lid.  Lift out the styrofoam's left side first.
To get the right side out, you must lift the build plate.  Make sure that you lift it from the back.  The joint where the build plate moves vertically is stronger and will allow you to pull it up slowly.
Now remove the protective film from the door and LCD and you're ready to power up!

Monday 23 January 2017

Creator Pro Update

So I got the Creator Pro on June 6th.
It is now January 23rd.  I don't have time to make a big post but I'll summarize how my personal experience has been.

Mods Done:

Spool Holders and Filament Guide:  definitely the first things to print off of Thingiverse so that you can use any size spools and get them fed properly.

Zebra Plate:  I was printing in ABS and it stuck too well to my build plate.  It was so hard to remove that it tore the build tak off with it.  I had to replace it but I thought it'd be good to get something removable and I found the Zebra plate stuff.  It worked ok but now I'm using it with build tak on it and glue stick with just PLA.  Haven't tried ABS yet.  Removing parts out of an enclosure really sucks and I miss my removable build plate from the Finder.

PTFE Tube Dead:  I should have known the PTFE tube was dead when I was changing filament from yellow to white and I kept getting yellow coloring in my prints for a while.  Too lazy to fix it, I just moved and focused on the right nozzle.

Double Extruders:  I wish I could say more positive things about it but I hardly ever use it.  I wanted to do more 2 material stuff but I haven't had much success with water soluble filament or HIPS.  It's on my to-do list but I definitely have not gotten value out of having 2 extruders.  I like the left extruder better because it has the fan blowing directly on the parts.

MicroSwiss All Hot End:  I got one to replace the left nozzle hot end.  Might as well since the PTFE tube is gone.  This is something I will do in the near future but I have bigger issues now.

Lubrication:  remember to lubricate your axles and drives.  I didn't do this for a long time which is probably I have the following issue:

X-axis Drive Issues:  Today on Jan 23rd my x-axis is messed up.  The machine just vibrates roughly for the x-axis.  Rebooting helped a little and then it went back to it's old ways.  Apparently this is a common problem that Makerbots had and it's one of my stepper motor wires that's screwed up.  I don't know which wire it is but I'm considering just swapping out the entire wire assembly for a quicker fix.  I wish I knew about this before I bought the Creator Pro.

Overall:
Given the cost and issues, I would have had better value buying another printer like a Prusa i3 MkII.  I just don't get good value from 2 nozzles and the issues I'm having now would have been better time and money invested into something that was better designed.  While the enclosure is a big plus, if I needed to have one then I'd look at doing just PLA on a Flashforge Guider or just getting something else that's enclosed and semi-portable.  But remember that my needs are different from others.  I have to bring my printers between locations and sometimes an enclosure helps people from not getting injured.  So I don't totally regret buying a Creator Pro, it has just been more annoying than all my other printers.

Busted Level Sensor!

So I've been printing a lot lately.  I like my Finders better than three other printers I have access to.  But today one of my Finders self destructed.

The leveling arm fell down on it's own while printing.  I don't know how it happened.  I don't know why it happened.  All I know is that it was dragging on top of prints until it bent itself useless:
Now most people don't like the leveling arm and I know how to level using paper.  But this is just annoying.  I could go get it fixed but since I don't know how it happened, the best thing for me to do is remove it for now.

Wednesday 4 January 2017

Flashforge Finder PTFE Tube Replacement / MicroSwiss Upgrade

Greetings Everyone!

It has been a while since I posted here.  I've been reallly busy.
I still like my Finders a lot.  After 7 months with a lot of use, I really like:

  • the removable build plate:  great for getting off those stubborn pieces that stuck too well.  Compared to my Flashforge Creator Pro where I had something stick so hard, I ruined the build tak, the Finder has always been good.
  • internal filament:  this has been great for moving the printer around.  I transfer it between home and work so it helps.  I also use an external spool holder for bigger, cheaper rolls of filament which is fine too.  The internal one has the advantage of stopping your print if/when you run out of filament though.
  • level assist: this thing works great for me.  I don't have to do the paper test and it's almost always pretty accurate.
But alas, I have hit a point where the Finder's biggest problem has popped up.

I've been printing PLA+ lately at 220C.  No problems there.  I tried some new colored filament and my prints were coming out weird.  Here were my symptoms:
  • prints came out structurally weak.  As if there was not enough plastic coming out.
  • I could hear a "ticking" kind of sound every now and then from the extruder.  It sounds like the filament is slipping as it is being fed in
  • there were gaps in my printing, it wasn't smooth
I immediately told my vendor (Digitmakers) and he knew right away what the problem was.  Of course before I called him I wasted time by taking apart my extruder servo, cleaning the feed heads and trying it again, just to have the same problems.

So Digitmakers told me it was the PTFE tube that had to be changed.  This is the plastic tube that goes down the heat break and basically feeds the filament from the extruder servo to the hot end.  It can get messed up over time and that results in difficulty feeding the hot end.

Disassembly:
Flashforge made a pretty good video of this which I followed:
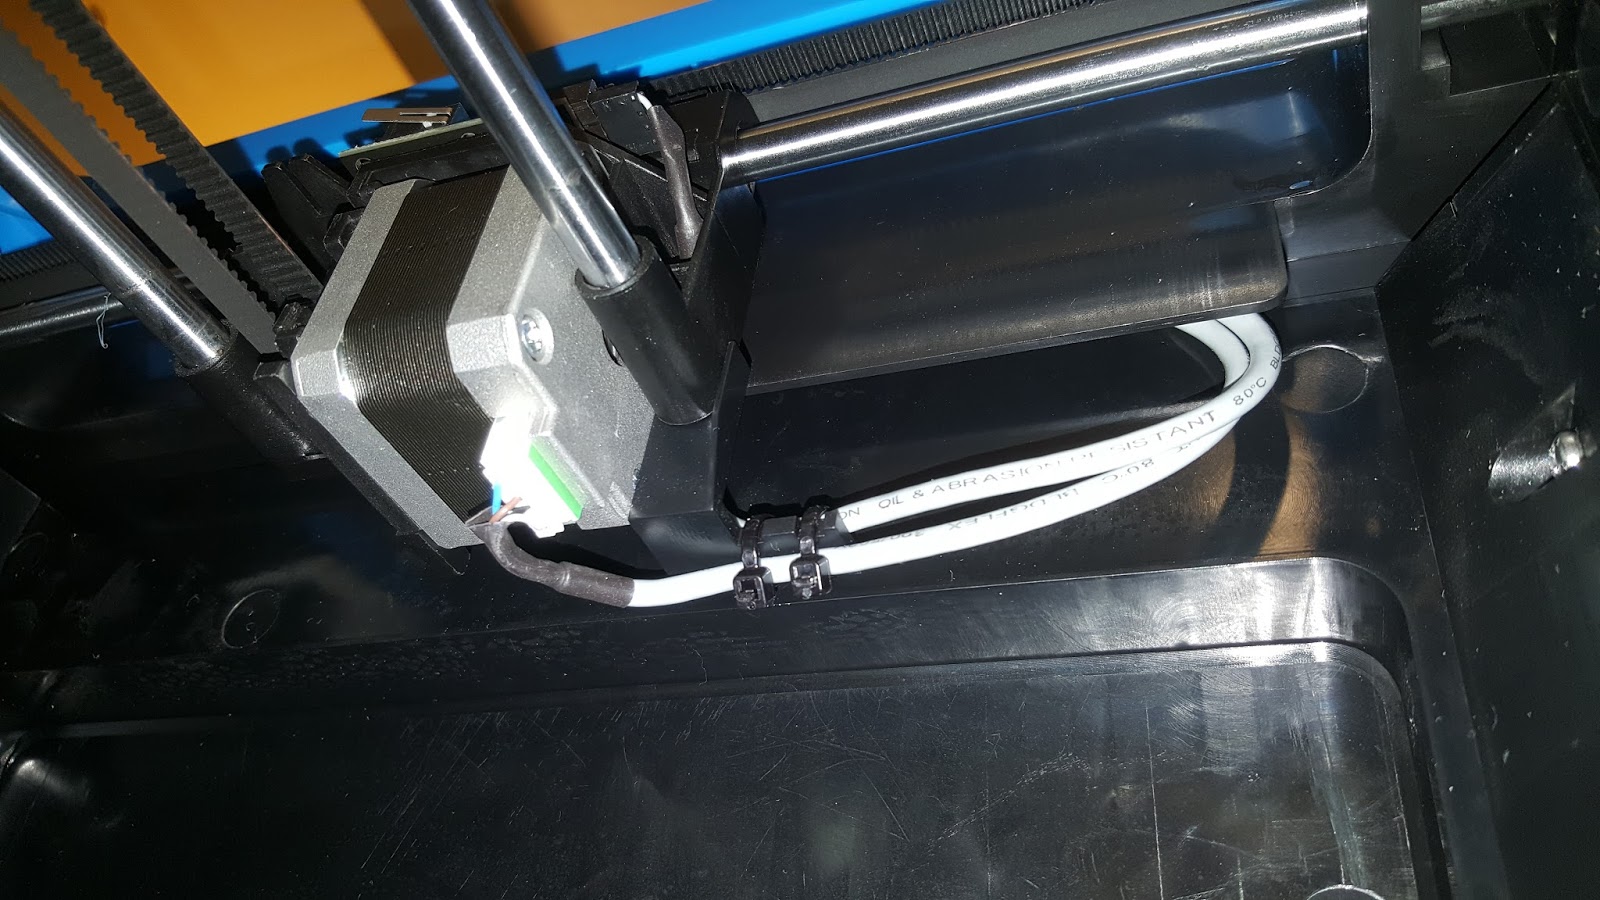
The one thing I didn't do was disconnect the "heating part" listed here:

This is where I get really paranoid because you can burn down your house if you screw this up.
This "heating part" includes the part that measures the temperature of your hot end known as the thermocouple.  A fire once happened in a 3d printer because the person forgot to secure this and it basically fell out while printing.  The 3d printer didn't know what the actual temperature was so it kept increasing the temperature.

So I didn't remove this at all.  I kept all the electronics plugged in.


THIS IS WHERE I MADE A MISTAKE
It didn't cost me but I should have done it properly.

I removed the nozzle and the heat radiating tube or nozzle holder (the thing with the fins) with two wrenches.  Make sure the wrenches you have are adjustable and fit properly.  Don't use a needle nose plyer or something that will scratch things up.  Make sure they fit snug on the heater block and the part you are twisting!  Remember left-loosey, righty-tighty for directions to turn.

I removed both the heat radiating tube and the brass nozzle without problems but I was lucky.  I should have heated it up before removing it.  Although dangerous and scary, what could have happened is that the brass nozzle could have snapped inside the heat block and cause some serious problems!  It didn't but it happened to someone before.

So I dodged a bullet and got good results.  
Here is a photo of the original Finder nozzle and the PTFE tube.  As you can see, the tube isn't looking so great.  It's burned a bit and clogged up.  This explains why extrusion was so difficult.  Keep in mind this is not a problem with the Finder, this is something that will happen with all printers using similar set ups!


New Nozzle:
Since I needed a new nozzle, I could have gone for the same brass one, but Digitmakers had Micro Swiss nozzles.  I had read that these were good so I went for the Mk10 plated nozzle the was wear resistant and a regular PTFE tube.  Maybe next time I'll go for the all-metal one but that's more than twice the cost.

Before putting the nozzle and everything back together, I took the opportunity to clean out one of the drive gears of the extruder.  Since it had been fighting to push filament through, it also had been shaving little bits off and reducing the effectiveness of itself.  So I took a wire brush to it to clean out the pockets of the gear teeth.

Attaching the Nozzle:
This time I got instructions on how to do this right.
1.  Hand tighten the nozzle on
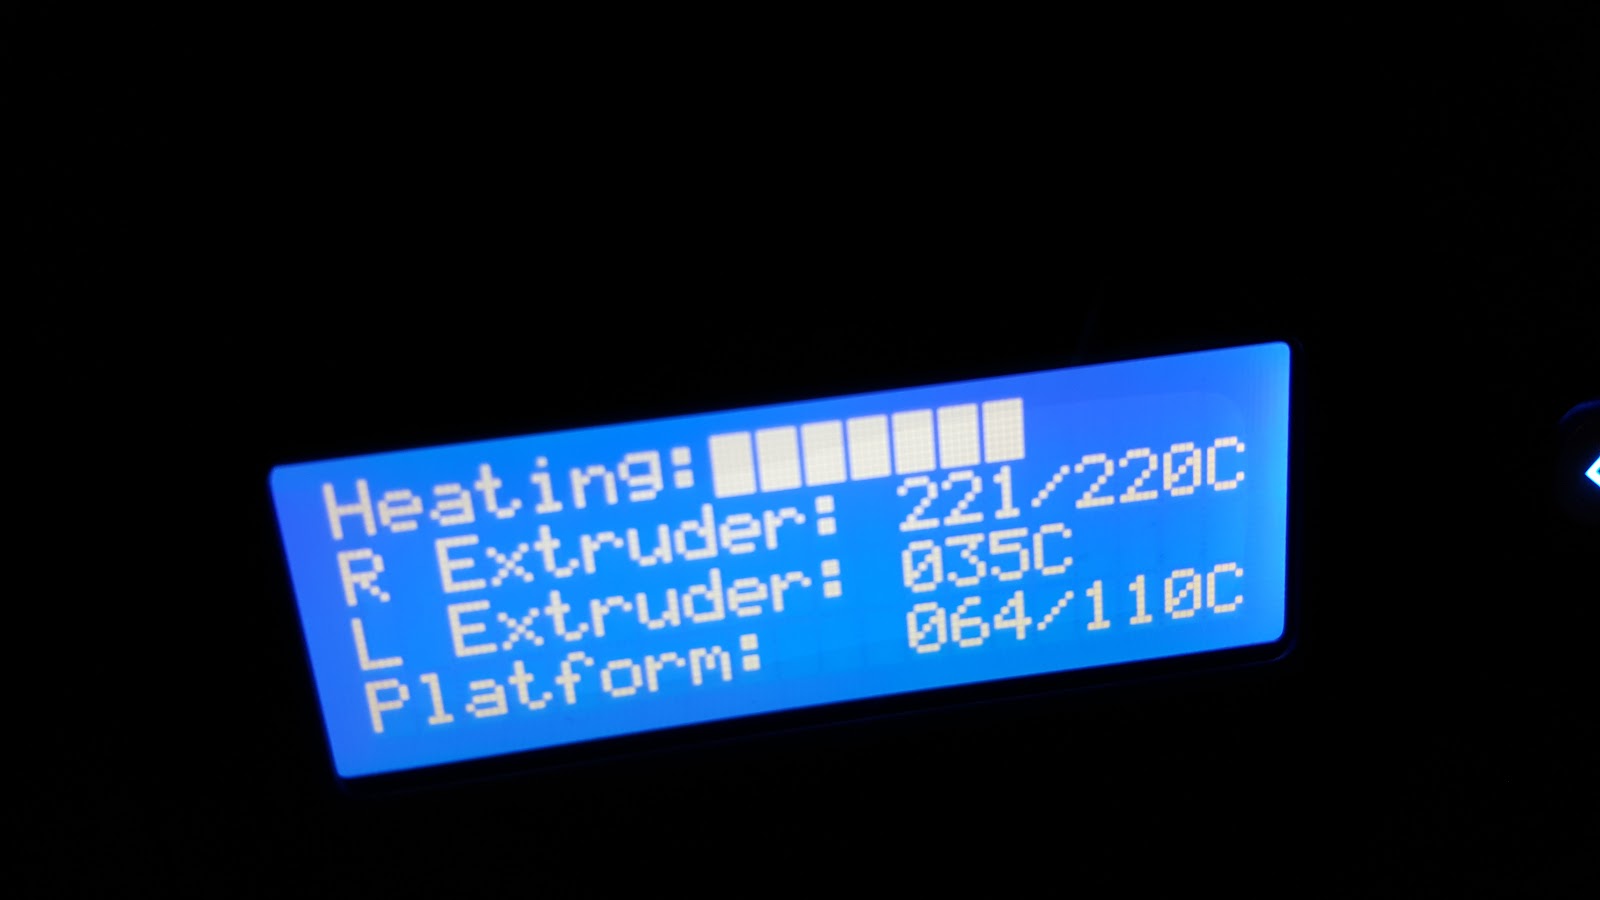
2.  Heat the machine up to PLA temp (220C is what I do PLA+ at so I went for that)
3.  While it is hot, the metal expands a bit and you can tighten it more with wrenches
Putting everything back is not fun.  There's a small set screw that is keeping the entire hot end assembly in place.  This thing is easy to have fall out and hard to put back into its hole.  After much fussing I got it back in.  Make sure that the hot end is put all the way up so that you don't mess up your heights when you are levelling your build plate.

Then test it to make sure that your temperature sensor is working (and not falling out) so your house doesn't go on fire.  I set it to pre-heat to 220C.

Finally feed some filament through!

It came out well and things look promising.


I ran a 20mm cube to see how well things thing worked.  
And it worked well!  Actually as I write this I just finished a 4 hour print and it seems like my printing quality went up a lot!  I checked again to make sure the temperature sensor is not falling out and everything is ok and I'm going to print another 4hr job overnight.

What makes me feel better is that the Finder has a baffle on the underside which is surrounding the hotend.  So it's unlikely that the thermistor can fall out from vibration.  That makes me feel a bit better keeping it unattended.  Of course I have a few fire prevention things in place in the washroom which I'll detail later. 


Wednesday 8 June 2016

Starting With the Creator Pro

Setup went well.  Instructions in the manual were good enough.  
Plate leveling went well also.  The card included with the box that you can use for leveling is nice.

With my Finder I printed a filament tube guide from Thingiverse:

The bad thing is that the connector side snapped, but the good news it still worked.

I'm not sure if it's Flashforge's filament but the filament snapped TWICE while I was loading it!

Loading the PLA filament into the right extruder was fairly straight forward and just like the Finder.
What's interesting is that the filament that came out was kind of red and merged with my green filament.  I assume this shows the printer was tested with red filament before it came out of the factory.


 Differences moving up from the Finder to Creator Pro:

  1. Interface:  definitely not as nice as the Finder's touch screen.  But this is just cosmetic preferences.
  2. Build plate leveling knobs - not as easy to get at like the Finder.  Partially obstructed by the metal build plate.  Not a huge issue, just different than the Finder.
  3. Heating the build plate will mean it will take longer to print but this is the sacrifice for not having parts lift.  You can turn this option off I think.
  4. You can't remove the build plate so tougher parts have to be muscled on top of the build plate inside the machine.  I'm concerned this can put off my z-axis.
Patience...steeper learning curve but it will all pay off in the end.


Monday 6 June 2016

Day 0 with the Flashforge Creator Pro

Picked up the 2016 Flashforge Creator Pro and Simplify 3D from Digitmakers today!  Also grabbed some filament including glow-in-the-dark and PLA+ to play with.  Lots of learning to do in my summer!
Opening the box there's the Quick Start Guide to go through that also has instructions on how to unpack to Creator Pro.
 It was pretty stuck in the box, but with my wife's help we got the whole thing out.
 And here's what the extruder unit looks like before I put it to work.  Good bye clean extruders!
 I had noted the heating block was bigger on one extruder and emailed Digitmakers about it.  It's not a problem.
 Now the top of the Creator Pro has this chunk of styrofoam in it that is holding the spool holders and some cables and tools.  The diagram shows it lifting out pretty easy but for me this was a HUGE problem.  It was so jammed in there it took me 10 minutes to wrestle with it to get it out.  Definitely not as easy to set up as a Flashforge Finder!
 One thing I should point out is that it comes with a fan that will blow onto your print surface.  I didn't even see this pointed out on the website or pictures before I bought the printer so it was a most welcome surpise!
That's all for today!  I'm going to print some Thingiverse mods before I put the Creator Pro to work.  I'll put that up in the next post!